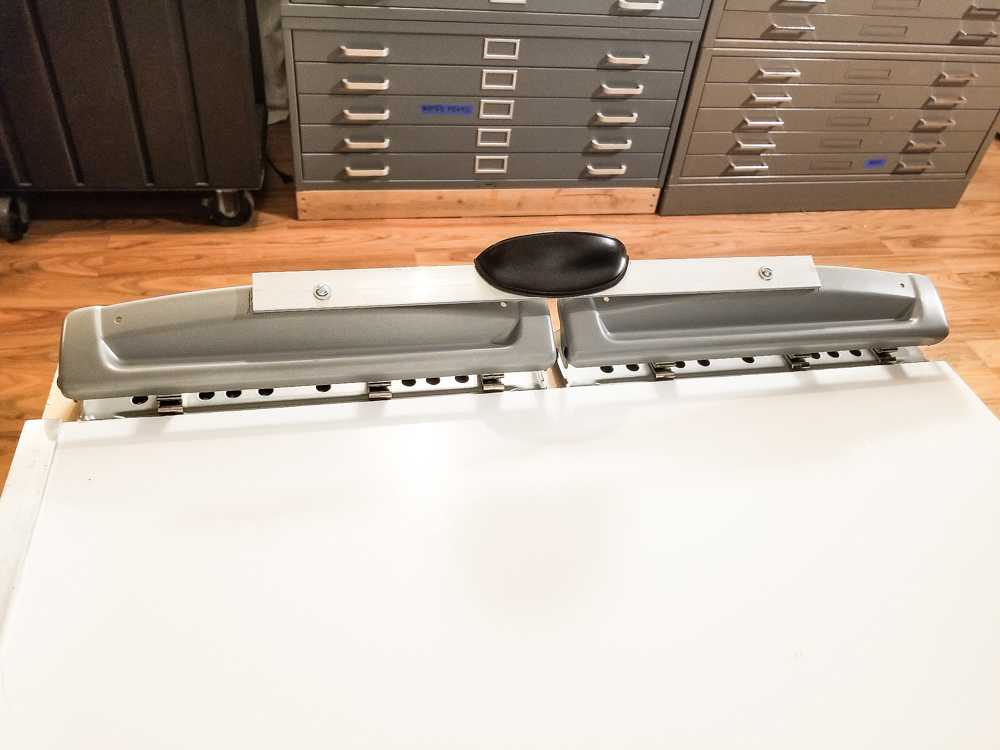
Today I completed a registration punch setup to include permanently mounted hole punches. Can’t wait to try it out on multi-layer carbon transfer printing. Not fancy, but I believe it will work.
Fine Art Photography and prints
Today I completed a registration punch setup to include permanently mounted hole punches. Can’t wait to try it out on multi-layer carbon transfer printing. Not fancy, but I believe it will work.
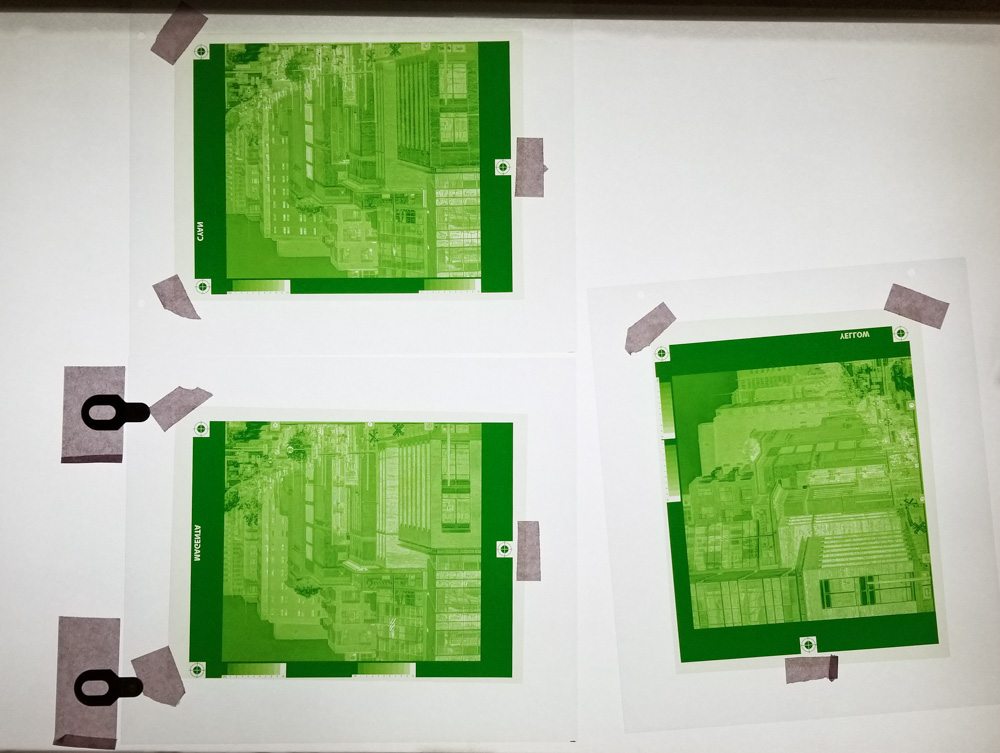
I’m in the process of revisiting tri-color gum bichromate printing and wanted to create a viable pin registration system. Here’s what it looks like with a negative. The paper is mounted onto aluminum using Fusion 4000 dry mount film and a heat press.
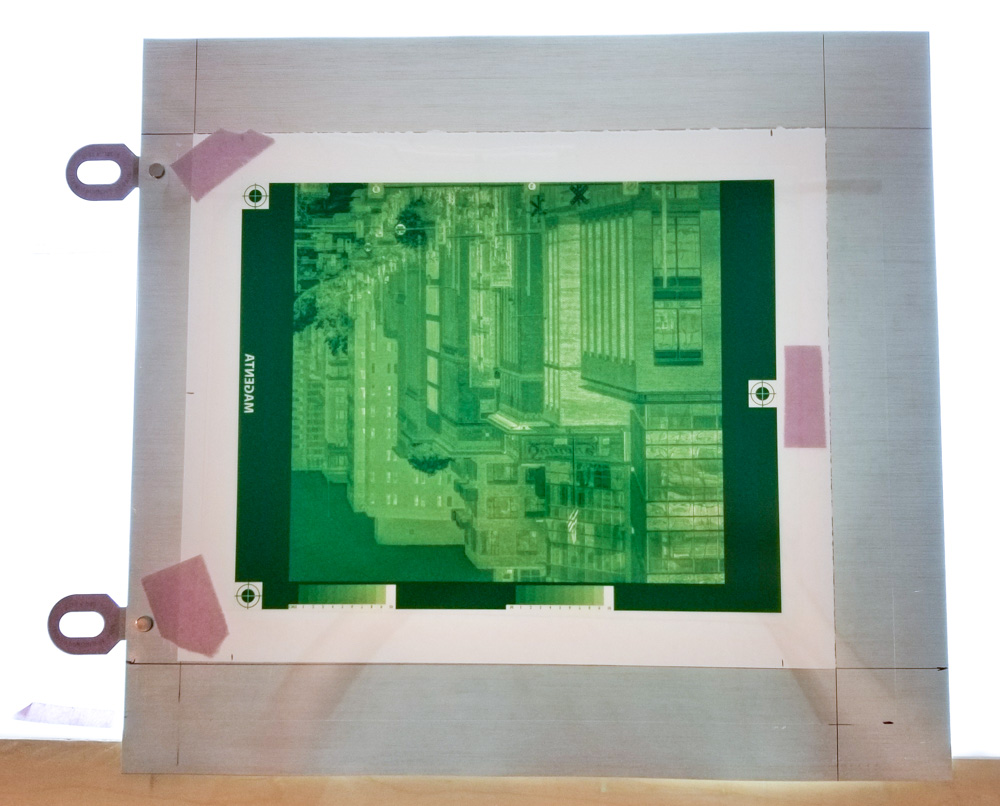
A sheet of 0.010″ aluminum flashing from the local hardware store serves as a ridged base to keep the paper from stretching or shrinking during the three-plus hours of water bath development . . .
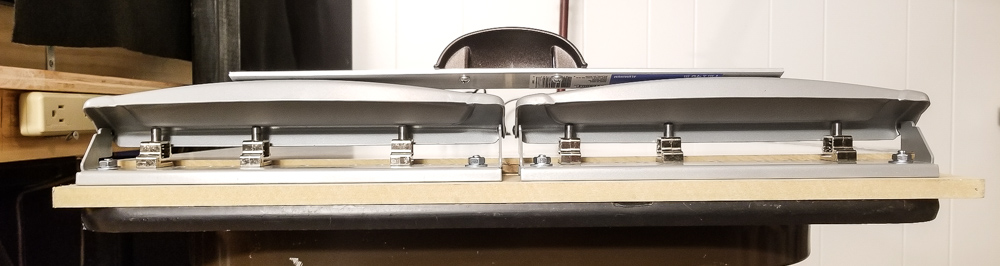
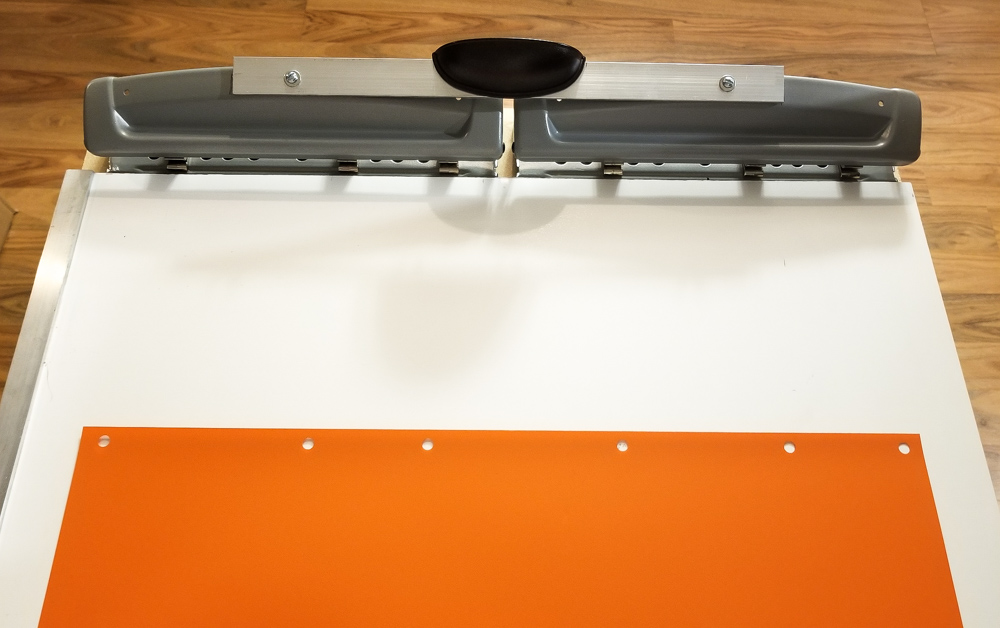
And a hole punch from the now-defunct “Staples” office supply. I modified the carriage to allow a larger opening on each side. First, I punch holes in the thin aluminum, then into all three carrier sheets simultaneously for proper alignment.
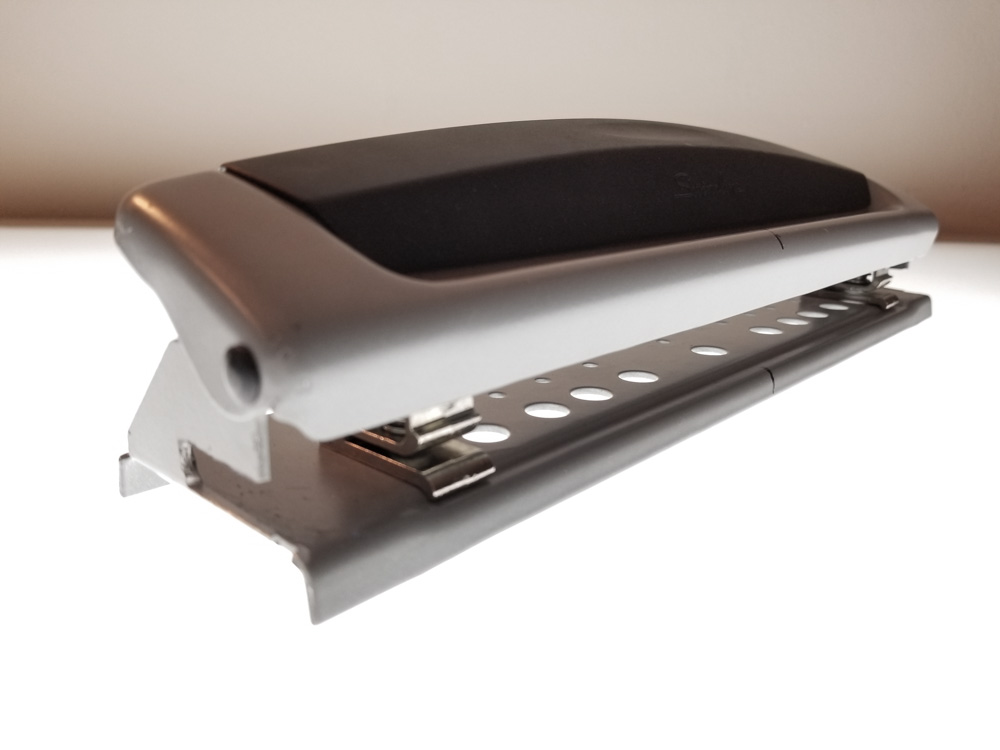
It punches a 9/32″ hole to precisely match the Ternes-Burton pins.

I begin with a 0.007″ Duralar carrier sheet for each of the negatives. The carrier is placed down on the two pins, and a negative is aligned and taped onto the carrier. Then a second carrier is placed on top of these and the second negative is aligned and taped to its carrier. Finally, the second film is removed and the final carrier is placed on top of the first and the third negative is aligned and taped.
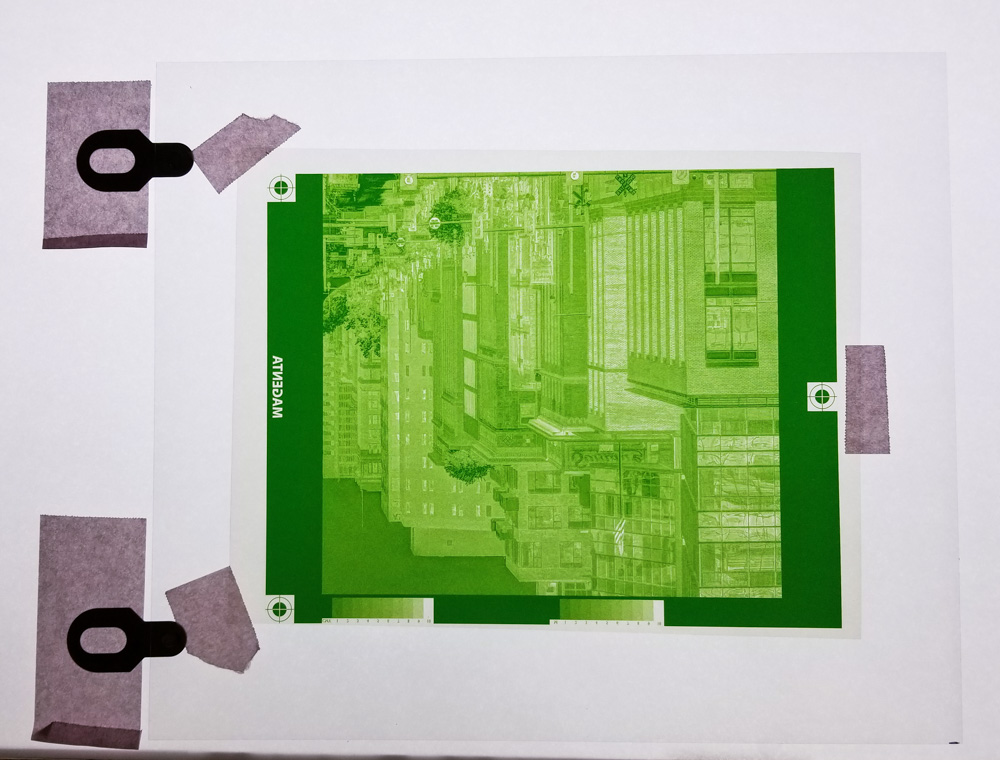
Here, all three negatives have been secured to a carrier sheet and are ready for printing. For each color, I install the pins into holes in the aluminum sheet, attach a carrier sheet (with negative) onto the pins and tape the sheet down to the metal. The pins are then removed and the exposure is made.
Does it work? I hope to find out this weekend. This system has been adapted from a video I found by Newman Company on silkscreen printing. Here’s the link:
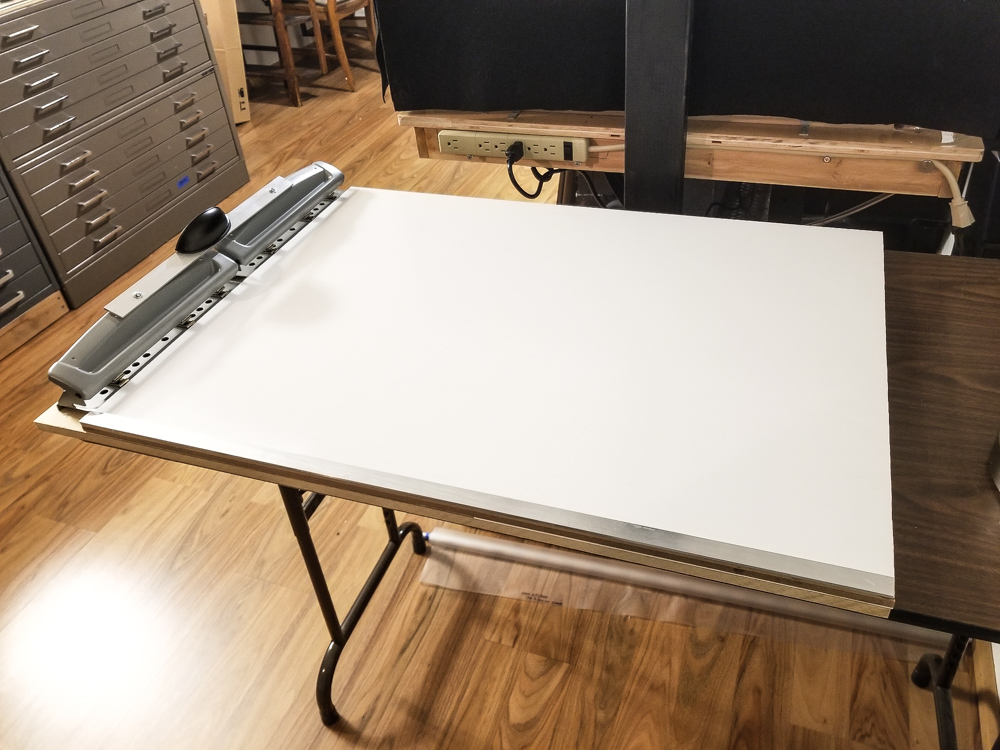
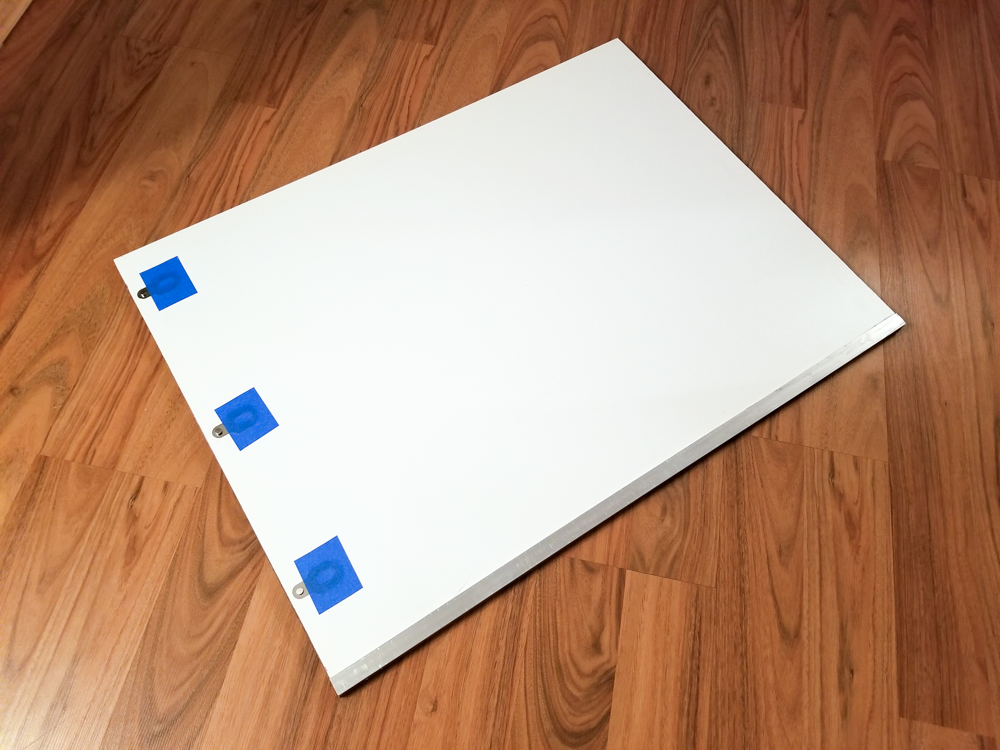
Here is a pin registration board I created today for making large color gum prints. It consists of white marker board from Home Depot, a strip of aluminum epoxied to the lower edge of the board to act as a base guide, and three registration pins taped into place on the left. Note: this is the same piece of board I showed in a post from 2016 when I was working in the gumoil process just re-purposed for color printing. It was a plain, flat board back then used for stretching full sized watercolor papers and measures 24″ x 32″. I can tape the pins anywhere near or far apart depending on the size of the print.
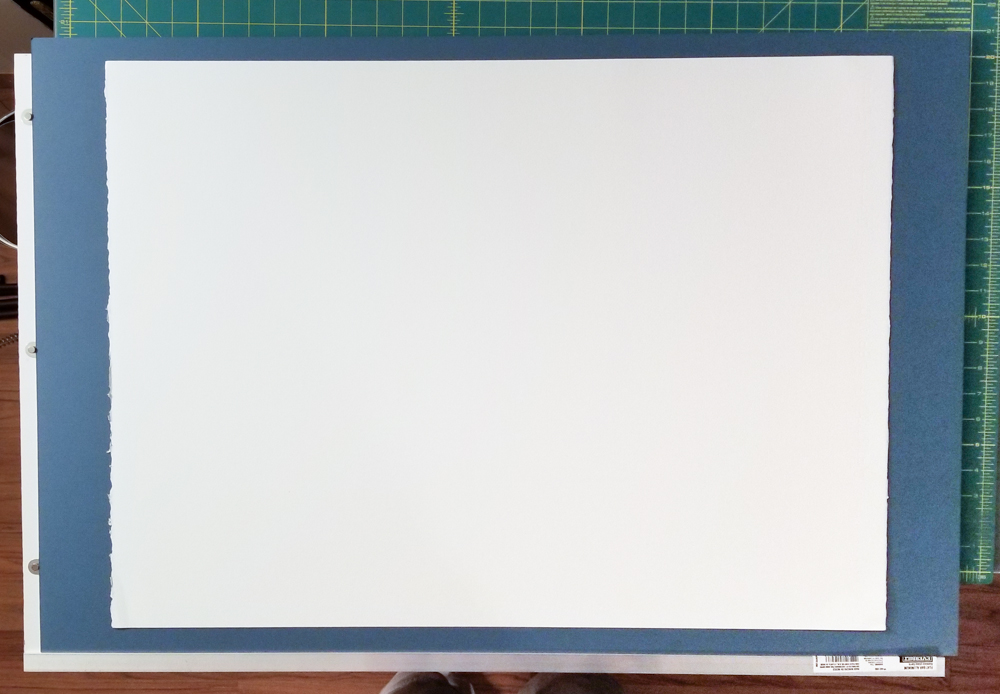
The next image shows what it will look like with a full size sheet (22″ x 30″) of Fabriano Artistico Soft Press. The blue mat board is only there to simulate a thin sheet of 24″ x 36″ aluminum to which the paper will be temporarily bonded using Fusion 4000 dry mount film and a heat press. The aluminum sheet will rest on the 3/4″ x 1/8″ thick aluminum bar at the bottom, and will bump up to the registration pins on the left for consistent placement.
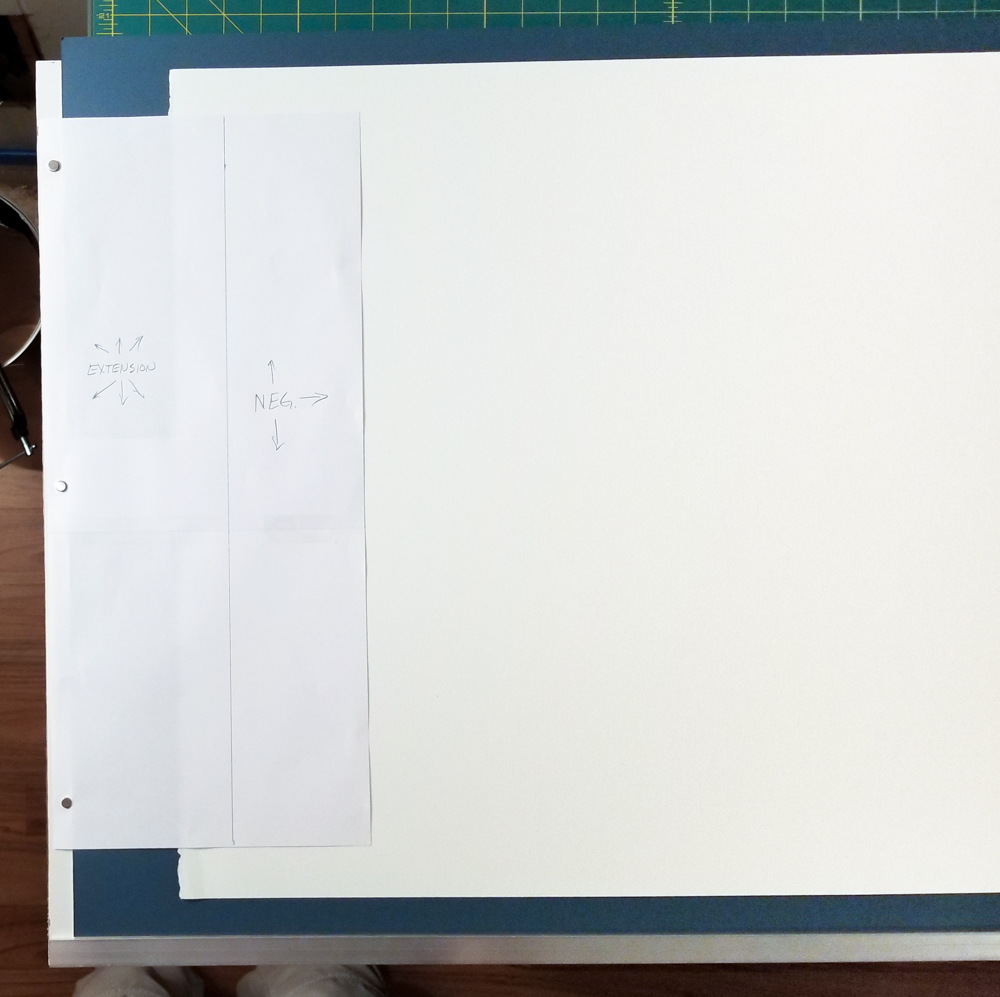
Again, having neither the aluminum sheet nor large separation negatives at the moment, I’ve tried to simulate an added piece of extension film with the registration holes punched into it and taped to the negative.
Here are the registration pins. I ordered two different heights, but all have 9/32″ pins. I am not sure which height I will need, but I suspect the shorter ones will suffice.
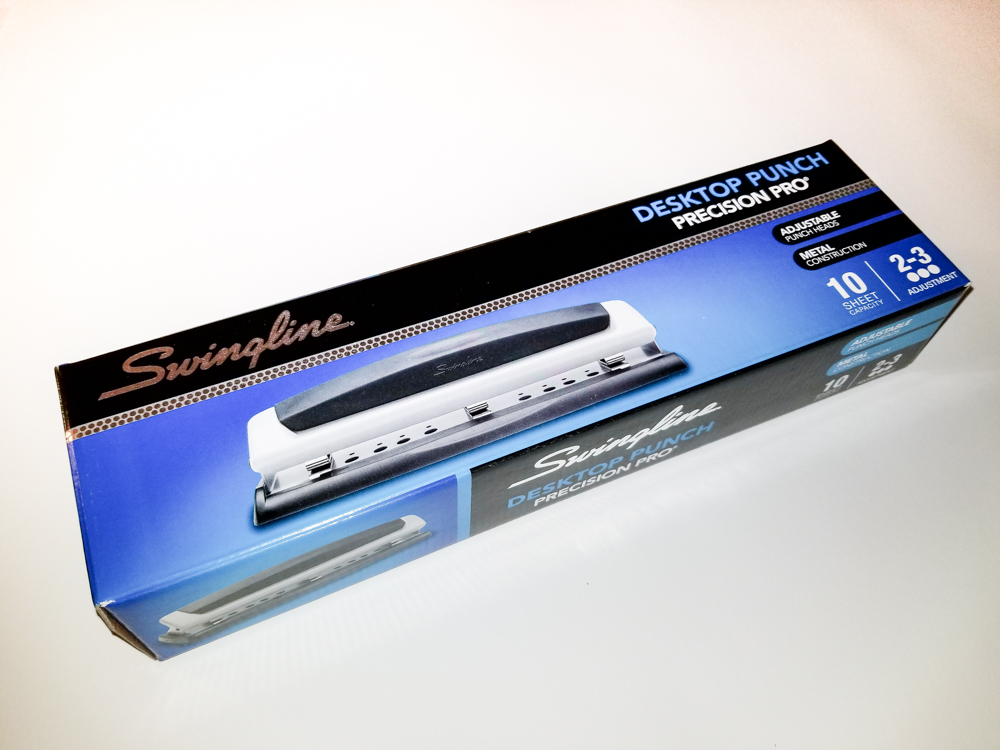
For punching the holes in the negative extension sheets, I found a 9/32″ hole punch this morning at Staples for $15.
I removed the center punch to give a larger spread between holes. My plan is to punch two holes; one in the center and the other near the bottom. Then I will slide the outer hole punch up to align with the existing center hole and punch a third hole at the top end of the negative extension sheets. This will give me a 17″ span between top and bottom holes plus one in the center.
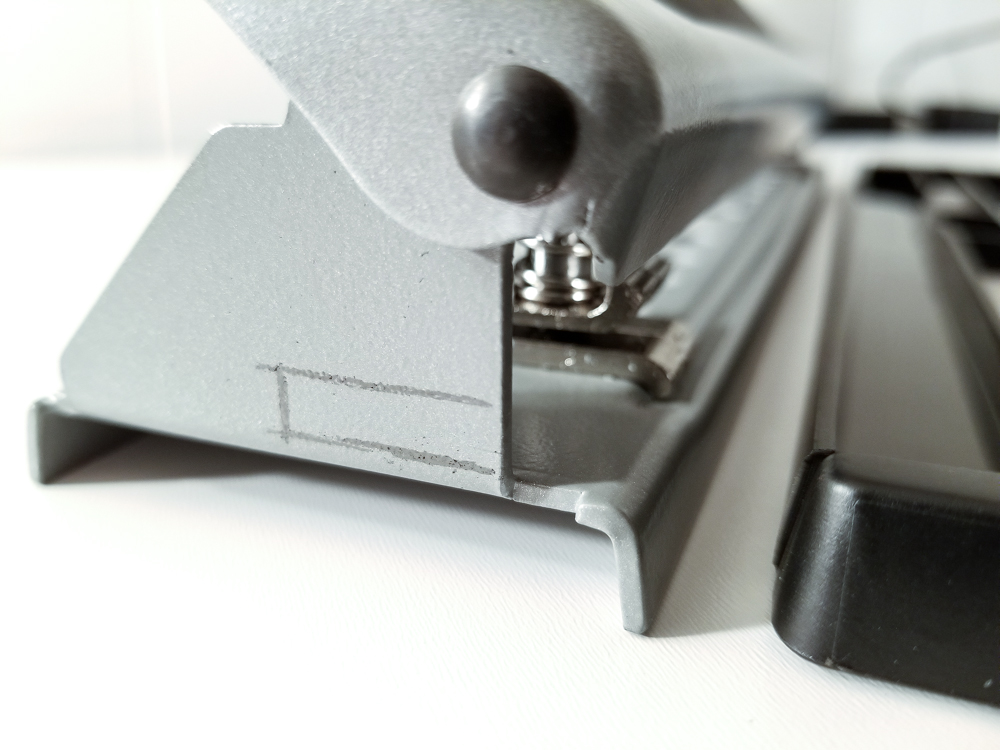
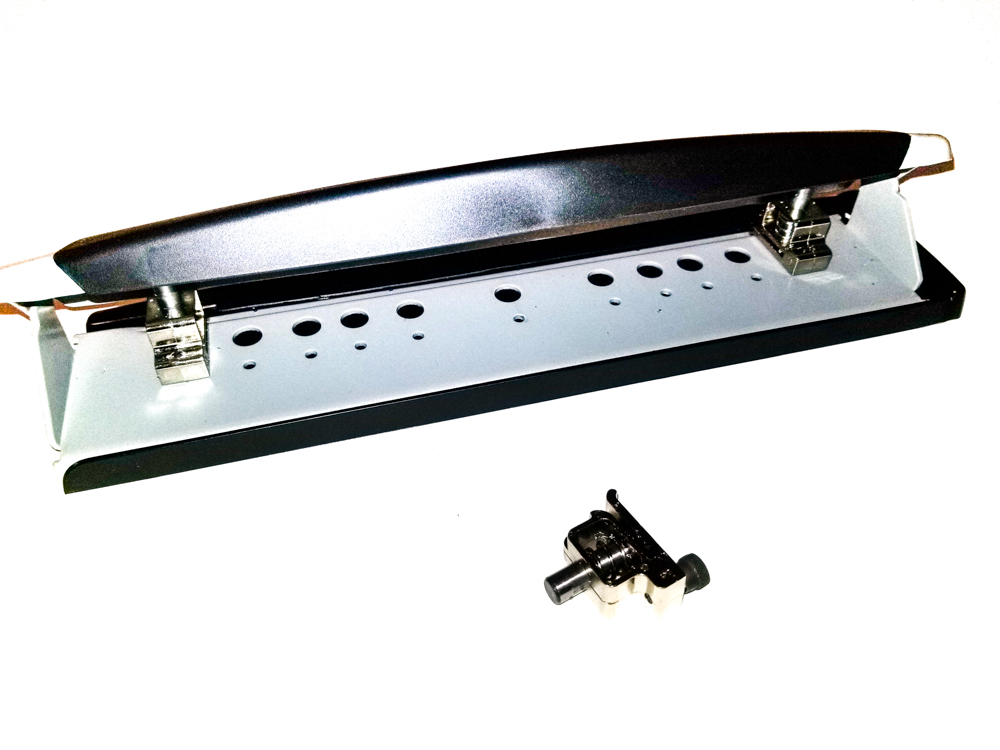 Before I can use the punch, I will have to cut a slot in the sides at both ends to allow for the wider film. I’ve marked where the metal will be removed.
 The advantage of this configuration is that I don’t need an expensive commercial registration punch AND will not need to punch holes in either the paper or the aluminum. In addition the paper will not stretch or shrink while printing multiple layers while mounted to the metal sheet. One down side will be having to align and tape down the pins for each size print. How well does it work? I will find out in the coming weeks as I complete my initial calibrations for gum printing.